Semantic Versioning: Setting Up a Semantic Release Pipeline
Hey there! I'm currently working as an Associate DevOps Engineer, and I'm diving into popular DevOps tools like Azure Devops,Linux, Docker, Kubernetes,Terraform and Ansible. I'm also on the learning track with AWS certifications to amp up my cloud game. If you're into tech collaborations and exploring new horizons, let's connect!
Semantic Versioning is essential for managing releases in software development, ensuring that versions are clearly defined and reflect the nature of changes made. In this blog, we’ll explore how to set up a Semantic Release pipeline using GitHub Actions.
https://github.com/muhammadhassanb111/semantic-release.git
1. Install Locally and Push to Git
Before setting up the CI/CD pipeline, it’s crucial to install Semantic Release locally. This allows you to manage dependencies and ensure that your package.json file is updated with the necessary packages. Use the following command to install Semantic Release and its plugins:
npm install semantic-release @semantic-release/git @semantic-release/github -D
Installing locally helps maintain a consistent environment across different development setups and simplifies version management.
2. GitHub Actions Workflow
Next, we’ll configure the GitHub Actions workflow that will trigger Semantic Release. Here’s a sample configuration:
on:
  push:
    branches:
      - main
  pull_request:
    branches:
      - main
jobs:
  release:
    permissions:
      contents: write
      issues: write
      pull-requests: write
    runs-on: ubuntu-latest
    steps:
      - name: Checkout code
        uses: actions/checkout@v4

      - name: Setup Node.js
        uses: actions/setup-node@v4
        with:
          node-version: 20

      - name: Install dependencies
        run: npm i

      - name: Run semantic release
        env:
          GITHUB_TOKEN: ${{ secrets.G_TOKEN }}
        run: npx semantic-release
Adding the GitHub Token
To allow Semantic Release to publish releases and tags to your GitHub repository, you need to create a GitHub token. Follow these steps:
Go to your GitHub repository.
Navigate to Settings > Secrets and variables > Actions.
Click on New repository secret.
Name your secret
G_TOKENand paste your personal access token.
This token enables secure access for publishing without exposing your credentials in the code.
3. Configuration for Semantic Release
Now, let’s define the configuration for Semantic Release. Create a .releaserc.yml file in your project root with the following content:
branches:
  - main
repositoryUrl: https://github.com/muhammadhassanb111/semantic-release.git
plugins:
  - '@semantic-release/commit-analyzer'
  - '@semantic-release/release-notes-generator'
  - - '@semantic-release/git'
    - assets:
        - 'dist/*.js'
        - 'dist/*.js.map'
      message: "chore(release): ${nextRelease.version} [skip ci]\n\n${nextRelease.notes}"
  - '@semantic-release/github'
Configuration File
Semantic Release’s options, mode, and plugins can be set via either:
A
.releasercfile, written in YAML or JSON, with optional extensions:.yaml,.yml,.json,.js,.cjs,.mjs.A
release.config.(js|cjs|.mjs)file that exports an object.A
releasekey in the project'spackage.jsonfile.
Alternatively, some options can be set via CLI arguments. Here are examples:
- Via
releasekey in the project'spackage.jsonfile:
{
  "release": {
    "branches": ["master", "next"]
  }
}
- Via
.releasercfile:
{
  "branches": ["master", "next"]
}
- Via
release.config.cjsfile:
/**
 * @type {import('semantic-release').GlobalConfig}
 */
module.exports = {
  branches: ["master", "next"],
};
- Via
release.config.mjsfile:
/**
 * @type {import('semantic-release').GlobalConfig}
 */
export default {
  branches: ["master", "next"],
};
- Via CLI argument:
$ semantic-release --branches next
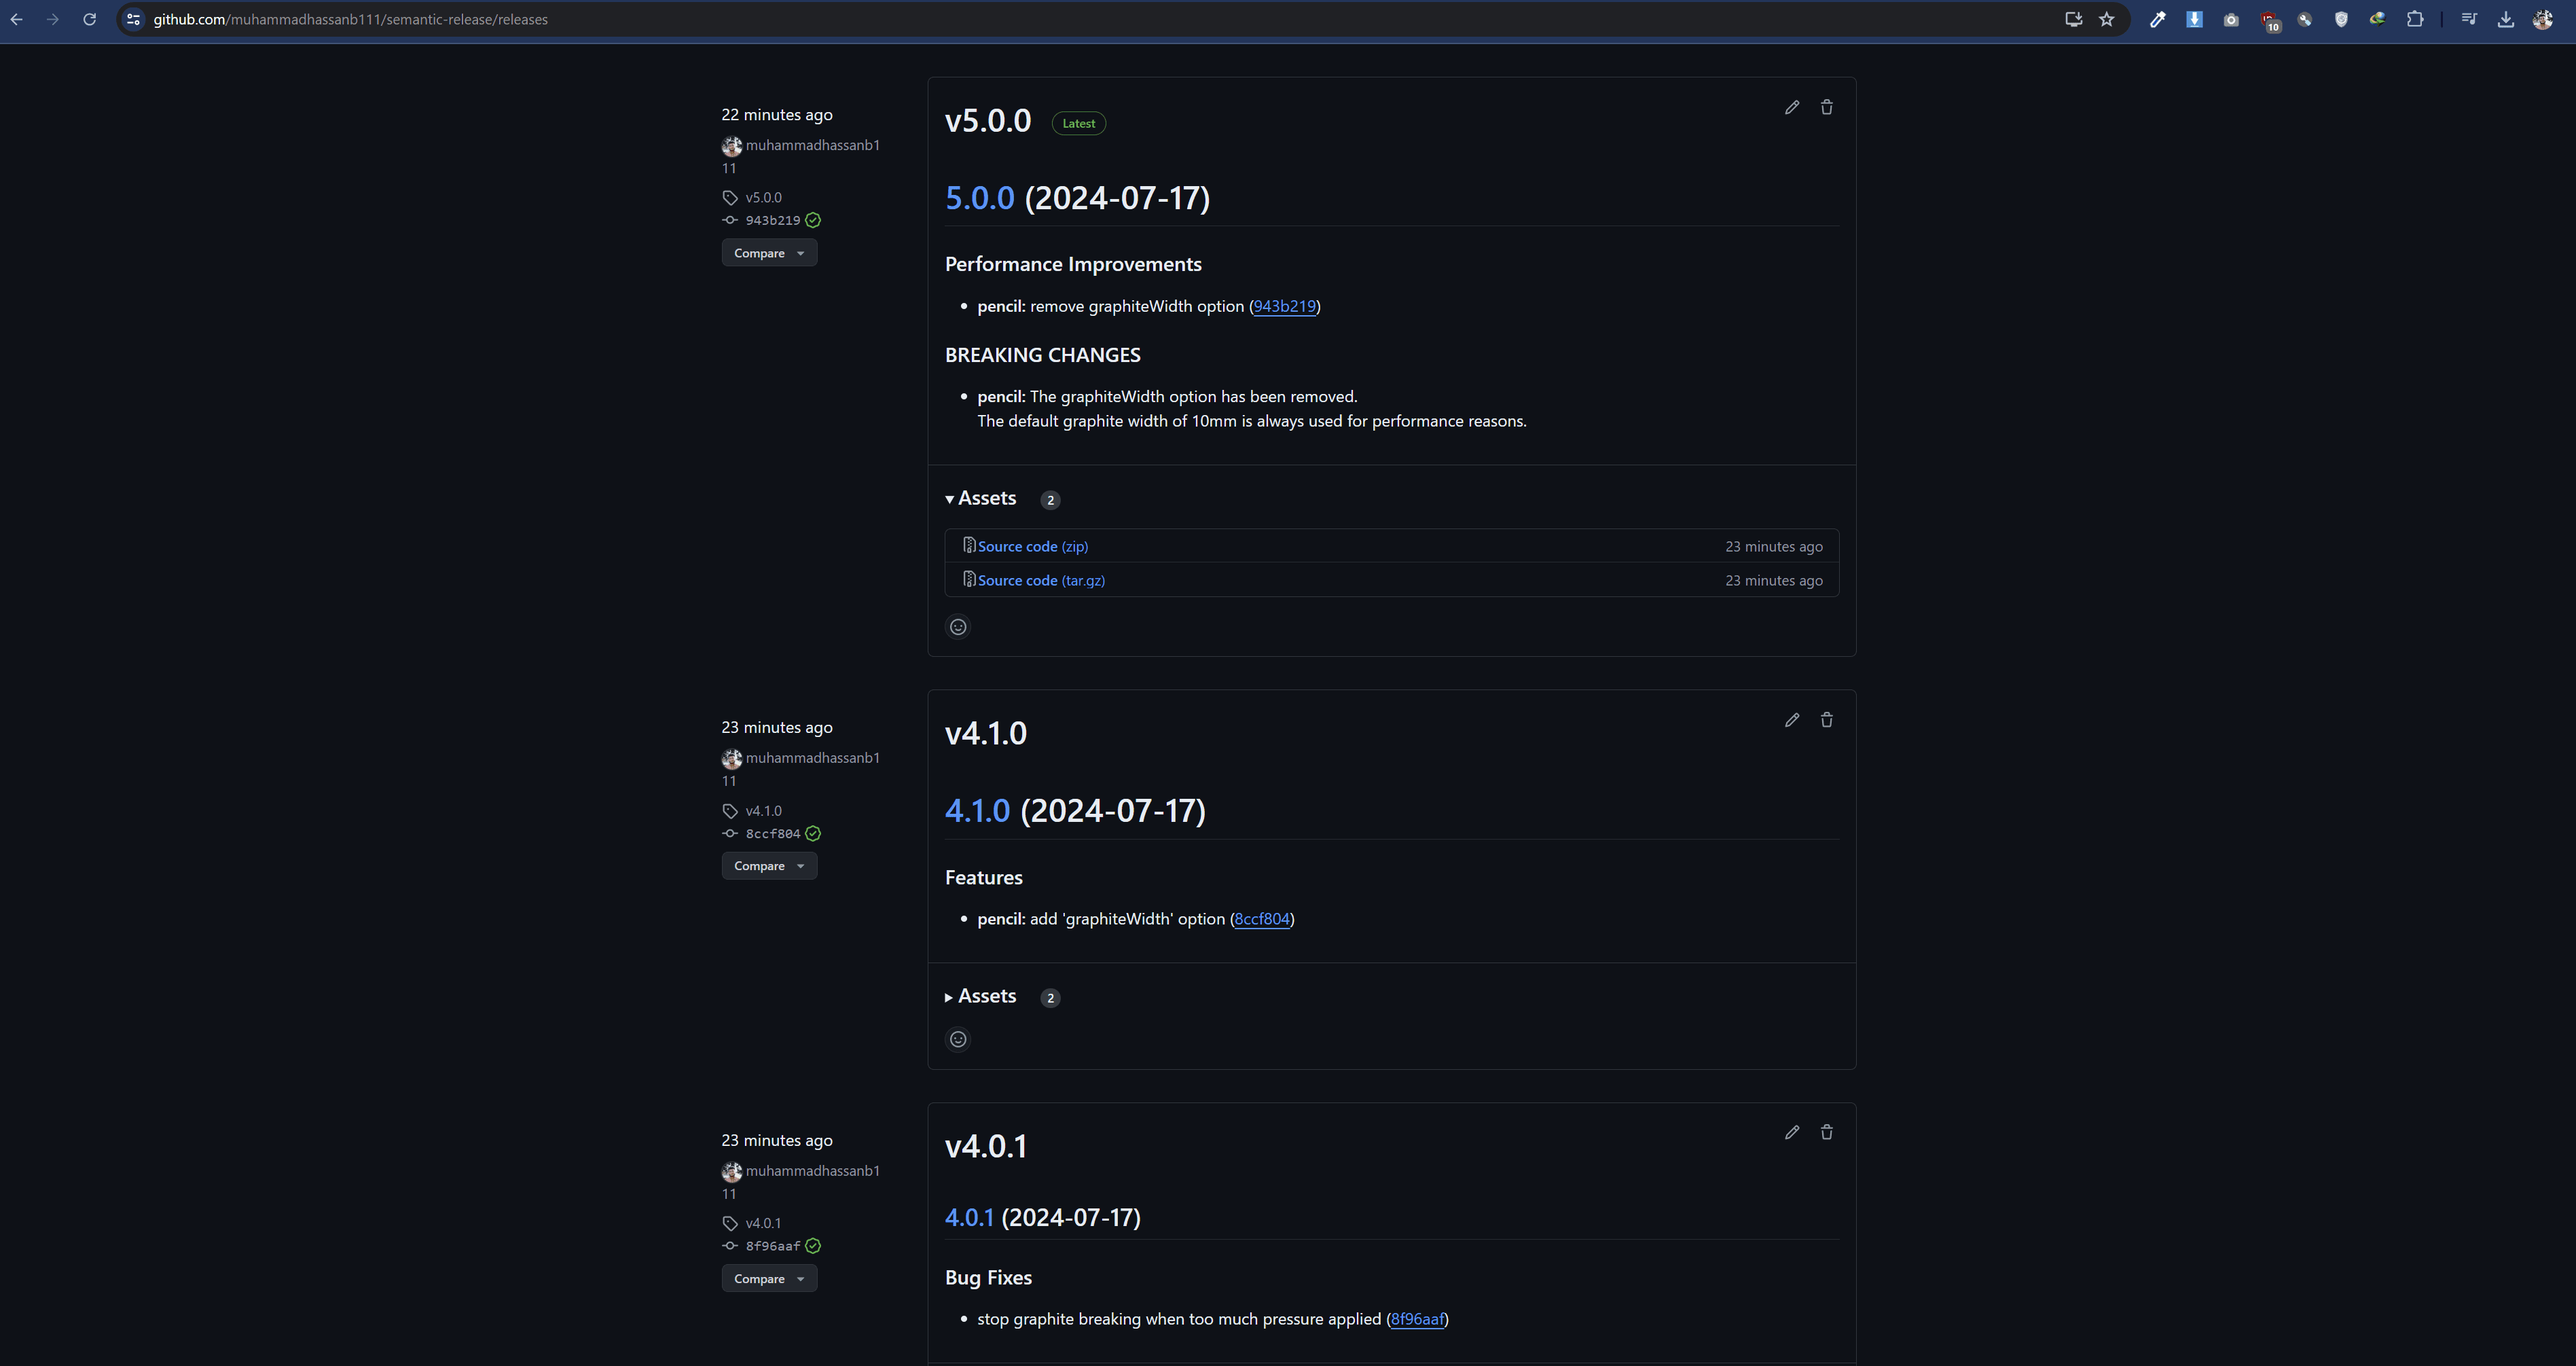
4. Commit Messages and Their Types
To leverage Semantic Release effectively, it’s crucial to use proper commit messages. Here’s a brief guide on the types of commits:

fix: A bug fix (e.g.,
fix(pencil): stop graphite breaking when too much pressure applied→ Patch Release).feat: A new feature (e.g.,
feat(pencil): add 'graphiteWidth' option→ Minor Release).perf: A performance improvement (e.g.,
perf(pencil): remove graphiteWidth option→ Major Release).
Important Note on Breaking Changes
For breaking changes, you must add the BREAKING CHANGE: footer in the commit message. This signals that the change may affect the functionality and compatibility of the software. For example:
perf(pencil): remove graphiteWidth option

BREAKING CHANGE: The graphiteWidth option has been removed. The default graphite width of 10mm is always used for performance reasons.
The fix: and feat: types can be used independently without requiring the BREAKING CHANGE: notice. However, any changes marked as breaking must follow the specified format to ensure proper versioning.


